Thursday 27 October 2016

Morphe 350S &35F Eyeshadow Palettes Review // BeautySickelmore

Morphe 350S & 35F Eyeshadow Palettes Review


These Palettes are amazing! They're highly pigmented and are long lasting on your eyes. I bought 2 of these palettes as I've seen very good reviews from others, so I decided to order some. I got the 35F and 350S. They both contain browns/golds/coppers/champagne colour and a mixture of others. Each palette contains 35 shades!
 
These swatches was done by using a small amount of eyeshadow to show the pigmentation of them! These were both roughly £21 and I ordered them from Cult Beauty as everywhere else was sold out of the 350S. I've been trying to get hold of these for ages but because they are very popular with youtubers and viewers they quickly get sold out.
 
These are the only things I've bought from Morphe but they are so high quality I will definitely be purchasing more from this brand whether that be palettes or brushes as they have some great reviews.


35F- I bought this palette as I waned to try different colours instead of just my same colours (golds/browns) and this palette was perfect for that. This contains a lot of autumn colours which will be great to experiment with! The amount of looks you can create with these palettes are endless. They are so worth their money! What I love about this palette is you get matte shades as well as shimmers which are great for the crease or blending softly over the eyes. This contains pinks, browns and more of a variety then the other palette I purchased. They are also very easy to blend into the crease.


350S- This was the palette which was always sold out! I can tell why. The colours are beautiful! They are all shimmers/glitters which look amazing on the eye on it's own or on top of another colour to create depth. They're colours which everybody uses are suits lots of different skin tones. Again the pigmentation is extremely good! The colours are all quite warm toned and great for autumn and winter. This palette has more golds, browns and champagne colours. They are also great at blending with and you can create endless amount of looks with them. 


Overall, I'm extremely pleased with my order and will 100% buy from Cult Beauty and Morphe Brushes again. The delivery/shipping was quick as well! These palettes are my new fave for eyeshadows! If you want great pigmentation for a good price defiantly purchase these and highly recommend them!


Thank you for reading this post! I'm going to become a lot more active with new posts every week as it's something I enjoy doing. Feel free to comment and share this post to your friends!


Thanks, BeautySickelmore xx 

Saturday 22 October 2016

My Everyday Makeup- Autumn 2016 // BeautySickelmore

My Everyday Makeup- Autumn 2016


Primer- I like to use my Stills Colour Corrective primer to prime the skin as this adjusts my skin tone to create an even colour so my foundation applies evenly and matches my skin tone. I like using this one because they cover my spots and dulls the redness of any blemishes before foundation and concealer so they can't be seen under my makeup.


Foundation- At the moment I use the Urban Decay All Nighter foundation as this makes my skin look flawless. I love how lightweight it feels even though it has full coverage! I always use moisturiser before applying foundation as my skin is combination so I get an oily t-zone and dry cheeks so this stop any products clinging to my dry patches. This foundation is well worth the money as a little goes a long way so I only use a pea-sized amount and that covers my whole face. I use a Real Techniques Buffing Brush to apply this foundation and blend it with a Beauty Blender to give a flawless finish.
 
Concealer- I tend to use 2 concealers one for under my eyes and spots and the other for illuminating under my eyes. The one I use for covering dark circles is Collection lasting perfection concealer which is my favourite drugstore concealer as it's got very good coverage and is very cheap. The other concealer is L'Oréal Lumi Magic concealer which I use to illuminate my under eyes on top of the Collection one. I use my Real Techniques Contour brush to blend in my concealer.
 
Powder- I tend to only use powder under my eyes and on my t-zone because I've got combination skin so it tend to cling to my dry patches. I love using the Rimmel Translucent Loose Setting Powder and use a small powder puff to push it under my eyes as it I dust the powder it tend to move the base makeup so I always push the powder onto my skin.
 
Contour/Bronze- At the moment I tend to focus on contouring my face so I use my Charlotte Tilbury Bronze and Glow duo palette to do this as on my skin it's more of a brown contour colour instead of a muddy/orange colour like many other contour shades. I like to use my Real Techniques Duo-Fibre Contour Brush to apply the contour under my cheekbones and around my forehead and blend it in with the same brush or I'll use my Mac 168 to blend further.


Highlighter- I love using my Sleek Solstice Palette as it's very cheap and highly pigmented. I like to use this under my eyebrow bone, on the top of my cheekbones, down my nose and on my cupid's bow to give a healthy glow to my skin. I tend to apply this with a fan brush or Real Techniques angled highlighting brush.


Brows- I like to fill-in my eyebrows with my Louise Young eyeshadow palette using the colours Maowi and Pom Pom. I use the darker shade to create my eyebrow shape and fill in the middle and end of my eyebrow and use the lighter shade to fill in the front of my eyebrow to give an ombre effect. I fill in my brows using my Mac 266 Brush.
 

Eyes- On my eyes I used my Naked Palette to create a champagne/gold smokey eye as this is what suits me the most. For mascara I used Maybelline Lash Sensational as this is my favourite mascara because it doesn't clump up on the eyelashes and it adds volume and length to them. Sometime I will do eyeliner using Soap and Glory Supercat Black Eyeliner as this is easiest for my to use. I don't wear eyeliner very often but when I do I would be using this as its like a pen and is easy to use.
 

Lips- For my lips I always wear my Mac Velvet Teddy lipstick as you can't go wrong with it. I t suits any skin tone and makes my everyday makeup look complete! I has a lovely texture as it's matte but it doesn't feel drying. It's a brown/pink nude colour which I love wearing everyday.


Thank you for reading this post! I'm going to become a lot more active with new posts every week as it's something I enjoy doing. Feel free to comment and share this post to your friends!
Thanks, BeautySickelmore xx 

Friday 21 October 2016

Top 3 Mac Lipsticks // BeautySickelmore

Top 3 Mac Lipsticks


I love wearing lipsticks! Especially ones which are nude/natural looking on the lips. I don't tend to wear dark colours unless I'm going to a special occasion. I like light pinks/nude colours because they complement my lips better then a bright coral or red. I don't think bright colours suit me because I have quite fair skin and blue eyes. I love the quality of Mac lipsticks because they do last a long time unless you eat or drink then they come off just like any other lipstick. I love the range of colours and finishes they do but I tend to go for mattes or cremesheens so I then have a variety of looks I can create.  


1. Velvet Teddy- £15.50
 
This is my go-to lipstick for every day because it's very natural on the lip. It is a brown toned nude lipstick which has a matte finish. It creates a different look on different skin tones so it looks a lot darker on me because I'm very pale but my friend uses this and it looks more pinker on her skin tone.


2. Angel- £15.50
 
This is a lovely pink/nude colour which is also very natural on the lips. It's a frost finish which is just like a cremesheen finish but less glossy. I love how this one looks on my lips as it's a your lips but better colour on my skin tone which just compliments my skin when I wear makeup.


 3. Pure Zen- £15.50
 
This was my first ever Mac lipstick! It's a peachy -pink colour which is very natural on the lip. This has a cremesheen finish which isn't too wet or too dry on the lips (it's a mixture of the two.) This lipstick suits any skin tone and suits me very well because it's not too out there which I like as I don't suit bright lipsticks.


Overall, I would rate Mac lipsticks 4/5 because I love Mac lipsticks as they are good quality, the only problem is they can range in price. The ones I have are all 15.50 but they can go up to £17/£18 which is quite expensive for lipsticks/glosses however, they are good quality and last very well on your lips compared to others such as Nyx Lip Butters which are cheaper  but don't last as long.


Thank you for reading this post! I'm going to become a lot more active with new posts every week as it's something I enjoy doing. Feel free to comment and share this post to your friends!
Thanks, BeautySickelmore xx 

Wednesday 19 October 2016

Top 3 Contour Brushes // BeautySickelmore

Top 3 Contour Brushes

 
I love using a variety of brushes to contour with because some are more precise and some are good for just bronzing the skin! I like to apply the product with my Bold metals brush to get a precise line and blend it with the duo-fibre Real Techniques brush or the Mac 168 brush as they both blend the contour out beautifully! They all range in shape and cost but I love them all equally the same. It's very important to blend fully when contour so it doesn't look like a solid line on your face (it looks a lot more natural).
 
 1. Real Techniques Bold Metals Brush 301- £22
 
I love this brush for applying the contour precisely to my face and gently blending it in before using more of a fluffy brush to blend. This brush is very dense so it's great for applying a lot of contour to your face. I love how soft these brushes are because they don't scratch my face and tend not to move my foundation underneath it! I tend to use my other real techniques brush more for everyday and use this one for special occasions or day when I want my make up to look more precise. I would rate this brush 4/5 because it's great at applying bronzer/contour but not really for blending it.


2. Mac 168 Brush- £28
 
This was my first Mac brush I ever brought! It's great for blending contour because if not as dense as the Bold Metals one and you can apply the contour with this but I find it doesn't apply as precisely as the Bold Metals one . I tend to use this on day when I want my skin to look sun-kissed and not contoured ad this isn't as precise as contour it's more for bronzing the skin. It's very soft so is great for evenly blending the product and it's very easy to use for  bronzing the skin if you don't want to contour so I would rate this 4/5 because it's a great brush but it's very expensive for one brush.
 
 
3. Real Techniques Duo-Fibre Contour Brush- £19.95 (comes in a set with 2 other duo fibre brushes)
I love using this brush for applying and blending bronzer and contour. This is very different from the others because this brush is duo-fibre which means the bristles as two different textures. The end bristles (less dense) easily blend the contour and do the work for you and the denser part of the bristles help apply the product. It's great for beginners as you gently apply pressure to the brush and it evenly and easily blend the bronzer/contour to give a natural look so, I would rate this 5/4 because it's cheap as it's in a set with 2 other brushes which are duo fibre (eyeshadow and powder bushes) which also work the product into the makeup evenly and easily so I would highly recommend these. At first they can feel quite scratchy on your skin but is the duo fibre bristles that are blending the product in.


Thank you for reading this post! I'm going to become a lot more active with new posts every week as it's something I enjoy doing. Feel free to comment and share this post to your friends!
Thanks, BeautySickelmore xx 

Tuesday 18 October 2016

Lee Stafford Chopstick Styler Review // BeautySickelmore

Lee Stafford Chopstick Styler Review

 
This is one of the best curling wands I've ever used! It creates tight ringlets/curls in the hair making your hair look like an African/Caribbean hairstyle. It's very easy to use and the results are amazing! It costs £19.99 which is quite cheap for a curling wand. The only fault with it is my hair is very long and thick so it take about 1 hour- 1 hour and 1/2 but it's well worth the time and effort. Just make sure not to brush your hair as this will pull the curls out.
All you have to do is section your hair with a small layer left out and take about 1-2cm section from that and wrap it around the wand. Always aim the end of the wand (black bit) towards the floor so it's easier for the hair to be released. I like to aim the hair away from the face on all sections but you can do a bit of both to create volume and shape. Just make sure you take small sections from your hair as this creates the best results!


The result were amazing! The hair had a lot more volume and it gave more shape to my hair. This Styler is well worth the money as you can achieve the same results from a perm but that costs roughly £60 however the results last for 6 weeks where as after sleeping on my hair it fell out a little bit but you can easily re-do it if you wanted this hair for after days.
I would rate this 4/5 because it has amazing results it's just when you sleep on it if you don't have naturally curly hair it will fall out but otherwise I love it!


Thank you for reading this post! I'm going to become a lot more active with new posts every week as it's something I enjoy doing. Feel free to comment and share this post to your friends!
Thanks, BeautySickelmore xx 


Thursday 13 October 2016

Top 3 Blending Brushes // BeautySickelmore

Top 3 Blending Brushes

 I love blending brushes as they make blending eye shadows a whole lot easier! They can vary in size, shape and length. I like to use a denser brush (Mac 217) to apply the crease shade a lightly blend then I go over with a thinner/lighter brush (Real Techniques) to blend it further. To be more precise I love to use an angled and smaller brush (Louise Young LY38).
 
The overall eyeshadow looks flawless once blended fully as it creates dimension to the eye. I tent to use light browns as transition shades and build up to a dark brown in the crease as this looks better then just going straight in with a dark brown shade and blending it. I like to add colour to my crease as it adds depth to the look and finishes the eye shadow off once blended fully.
 
 
1. Mac 217- £20
 
I love my Mac brush as it's dense so it will evenly distribute the colour and blend it flawlessly without much effort. It is the most expensive out of the 3 but it's the quickest at blending the crease. The bristle's are soft and fluffy so it doesn't hurt the eyes when blending. I would rate this 5/5 because although it's quite expensive it does the job quickly, so when I'm in a rush I love to use this.


2. Real Techniques Bold Metals 203 Tapered Shadow- £16
 
 I love this one to further blend the eye shadows so the darker colour is fully blended into the crease and isn't just one solid line. The thing I love about this brush is it's weighted so when you hold the brush it adds the correct amount of pressure to gently blend the colour without applying to much (it does most of the work for you!). This is the cheapest out of the 3 but in way I like this the most as the bristles are looser and the pigment can be easily blended! I would rate this 5/5 because of this.


3. Louise Young LY38- £17
 
This brush is great for being precise with adding colour and blending as it is tapered at the end. The bristles are firmer then the other  2 but I love to add colour with this brush and blend the colours together with it. This is also great because it's the longest brush so the further away you hold the brush from the bristle the better/softer finish you'll get. I would rate this 4/5 because it's amazing but it can be a bit harsh on the eyes before washing it for the first time or using it for the first time.


Overall, blending brushes are very important to finish he look so you don't have a solid line of dark colour in your crease. I would recommend all 3 for different reasons as they all blend easily but they have different factors to consider such as cost, texture etc. I use all 3 everyday to create lovely eye shadow look as they are all quick and easy using! The further away you hold the brush from the bristles the better! (You get a better blended edge!)


Thank you for reading this post! I'm going to become a lot more active with new posts every week as it's something I enjoy doing. Feel free to comment and share this post to your friends!
Thanks, BeautySickelmore xx 

Wednesday 12 October 2016

Urban Decay Naked Palettes Review // BeautySickelmore

Urban Decay Naked Palettes Review


I love all of the Urban Decay Naked Palettes which I own because they are highly pigmented and last all day and night without an eyeshadow primer. There are so many looks you can create with them from an everyday light smokey eye to a night time dark smoky eye. There are a mixture of shimmers and matte shades. I have the naked palette 1,2,3 and Smoky. They all have different colour eye shadows and packaging but they all cost the same amount of money £38.50 which is expensive however, it's well worth the money as in each palette you get 12 highly pigmented eye shadows which are easy to blend!
 

1. Urban Decay Naked Palette
 
 This is my favourite palette out of all of the Naked palettes! I love golds, coppers, browns and champagne colours so, this palette is perfect for me. I would rate this 5/5 because of the pigmentation as a little goes a long way! This palette is great for everyday looks as the shades are shimmery and light in colour and the matte shades can be used to darken the crease.


2. Urban Decay Naked Palette 2
 
 This palette is darker then the first one however this is a must have for evening looks as you can easily create a dark smokey eye with this palette. I would rate this 5/5 because of the pigmentation. I also love Half Baked which is included in this palette and the first one. This is one of the only palettes with a jet black matte shade which is great to darken the crease or as a soft eyeliner which can be smudged out to create a smokey eye look.


3. Urban Decay Naked Palette 3

This palette contains a lot more pinkey- shades/undertones. This is great for everyday and there are a lot of darker shades as well so you can create lots of different looks from this palette! I would rate this 5/5 for pigmentation. I love how you can create every day or night looks with this palette as it contains light and dark colours which are great for doing different looks!


4. Urban Decay Naked Palette Smoky
 
 This is the darkest palette so I don't tend to use this as much unless I create a dark smokey eye which this is great for as I contains browns, greys and blacks. I love how his palate has a mixture of matte and shimmers shades! This palette has the most amount of matte shades which are great do darkening the crease to create more of a dramatic look. I would rate this 5/5 for pigmentation.


Overall, I love these palettes for their pigmentation as a little goes a long way and they are easily blended. I like to apply them with a flat eyeshadow brush (Mac 239) to pack the colour onto the eyelid and if I want more colour I tend to use my finger as this picks up more product then a brush! I like to blend the crease with a Mac 217 brush which is a soft blending brush which fits perfectly into the crease and socket of the eye.
 
I like how each palette has different packaging as it gives them all a different appearance however, I prefer the packaging of the Smoky Palette as it looks more sophisticated and modern. These palettes are expensive but for the colour payoff and the amount of colours you get it's well worth the money! I find if I pay a little more for eye shadows they tend to last longer and have higher pigmentation to them.


Thank you for reading this post! I'm going to become a lot more active with new posts every week as it's something I enjoy doing. Feel free to comment and share this post to your friends!
Thanks, BeautySickelmore xx 

Sundown 2016 // BeautySickelmore

Sundown 2016


Sundown is a music festival hosted in Norwich, Uk which is my home town so I try and go each year but this year was the best! It runs over the weekend and is cheap for the acts you see.
 
However, the weather this year wasn't as good. This year I decided to camp with my friend and we had an amazing time! On the Friday we queued up and set up our tent and the weather was good until the next morning. On the Friday there was also an opening party which has a radio dj Danny Howard host it. Me and my friend decided to go and check it out and then return to our tent early so we could get some sleep before the festival officially started.


The Saturday was horrible weather which was raining through out however, there was good acts on so I decided to buy a rain coat and stand in the rain to watch most of the acts but the rain was getting heavier so we decided to leave when the last few acts came on which wasn't too bad because I'd seen them before so I wasn't disappointed, I was just cold and wet but we had a good laugh anyway!


The Sunday was so much better with the weather and the acts were a lot better as well so if I would redo anything I would've bought a ticket for Sunday only, because people such as Jason Derulo and Year & Years were performing. They were amazing! The atmosphere was a lot better on Sunday as well because the sun came out and everyone was enjoying themselves a lot more then Saturday in the rain!


Overall, the experience isn't one I'm going to forget! It was one of the best weekends of my life. Listening to music and having a laugh even when it rained. I've been a few times and this year had the best acts and the best atmosphere I would highly recommend the festival to anyone who wants a laugh and a great experience! Thanks Sundown for an amazing weekend!


Thank you for reading this post! I'm going to become a lot more active with new posts every week as it's something I enjoy doing. Feel free to comment and share this post to your friends!
Thanks, BeautySickelmore xx 


Tuesday 11 October 2016

How I Clean My Beauty Blender // BeautySickelmore

How I Clean My Beauty Blender

 
Beauty Blenders Cleaned Using Solid Soap Which I Prefer.


When I clean my Beauty Blender I find it easier to us a hard/solid soap rather then a liquid one as I find it makes the sponge a lot cleaner and it's quicker and easier to use. All I do is rub the soap all over the sponge and then rinse under water to remove any soap. I may have to do this 2/3 times depending on how dirty they are. If I use a liquid soap I find it take me longer to get the soap out of the sponge and doesn't clean it as well.
 
I try to wash them at least once every 2 weeks because sometimes I don't use my Beauty Blender and I'll use a brush instead. I like to apply make up with a buffing brush and then blend it in with my Beauty Blender so they don't get dirty as much as some people who use a Beauty Blender to apply the makeup as well as blend it in.
 
I love using it because it gives a flawless appearance to the skin and makes the foundation go a lot further. I like to dampen the sponge before I use it so it doesn't soak up as much products as a dry one which uses up twice as much foundation because the sponge soaks it up when it's dry! 


Thank you for reading this post! I'm going to become a lot more active with new posts every week as it's something I enjoy doing. Feel free to comment and share this post to your friends!
Thanks, BeautySickelmore xx 

Sunday 9 October 2016

How I Clean My Makeup Brushes // BeautySickelmore

How I Clean My Makeup Brushes

 
I like to clean my brushes thoroughly once a month and a quick cleanse once a week if possible!
 
If I'm doing a quick cleanse I will use my Mac brush cleaner and a clean towel and apple a small amount to the brush and swirl it onto the towel to remove any makeup. I sometimes have to do this 2-3 times if I haven't done it for a few days.
 
If I thoroughly clean my brushes I will use any soap/brush cleaning soap and apply it to the brush and add water and swirl it on a towel and repeat this 2 time to clean my brushes.
 
If I have a lot of brushes to clean I tend to use my Real Technique brush cleaning palette as this had many different textures on it so all brushes small or big can be cleaned on it and it make the process a lot quicker and easier as you add the soap to your brush and then swirl it in the palette and rise the soap from the brush under water and repeat if needed and then towel dry the excess water and leave to dry either using the Real Techniques brush case and point the brushes towards the ground so the water can fall down and the water won't go up into the brush which can make the hairs of the brushes weak and fall out as the glue gets hot and releases them. You can alternatively lay then sideways and put in on the edge of a table so the air can flow all around the brush.
 
After washing your brushes they become a lot softer and normally foam their original shape if not when wet shape them back to how they were so they can dry into that shape.


Thank you for reading this post! I'm going to become a lot more active with new posts every week as it's something I enjoy doing. Feel free to comment and share this post to your friends!
Thanks, BeautySickelmore xx 

Marble Cake // BeautySickelmore

Marble Cake


This is my favourite type of cake! It's a mixture of vanilla and chocolate sponge with vanilla or chocolate buttercream on top.


This cake was a recipe which has been used by 3 generations of my family, me my mum and her mum (my gran). The cake is loved by everyone who eats it!
 
 
It's so easy to make as it's an all-in-one method and cooked for 40-45 minutes. It can be decorated how ever you like but I like to cover it in vanilla buttercream and chocolate buttons. I recently added new decorations which was melted chocolate drizzled over and I used a cocktail stick to make a pattern in it and I also made some churros  which were inspired from The Great British Back Off. This cake was for my dads birthday and he wanted the churros on the top as they reminded him of cinnamon sticks which we bought in Florida when we went on holiday in 2010!
 
 
Ingredients
 
6oz Butter
6oz Caster Sugar
3 Eggs
6oz Self-Rising Flour
1tsp Vanilla Bean Paste
1tbsp Coco Powder
 
Decorations( * = optional)
 
6oz Icing Sugar
3oz Butter
500g Cadburys Chocolate*
1 Tube of silver pearls*
1 Small bag of milk chocolate buttons*
1 Small bad of white chocolate buttons*


The cake turns out to be moist and a crumbly texture. To get the marble affect you make the batter and divide it into 2 or 3 but I like to use Chocolate and Vanilla but the traditional one has an extra flavouring of Coffee but you can use any flavourings. You spoon Vanilla batter then Chocolate then Vanilla all I  one row and then alternate for the next so Chocolate, Vanilla, Chocolate and then repeat which creates the pattern. You then use a palette knife to combine the colour and make the blobs all one level to give it the marble effect. On this cake I also added silver pearls/balls on top to add colour.
 
Thank you for reading this post! I'm going to become a lot more active with new posts every week as it's something I enjoy doing. Feel free to comment and share this post to your friends!
Thanks, BeautySickelmore xx 

Saturday 8 October 2016

College Course 2016 // BeautySickelmore

College Course 2016 // Hairdressing Level 2

This was my first attempt at a French Plait!
 
This year I decided to change courses from Beauty Therapy to Hairdressing Level 2 and so far it's been a great change! This is my second year at college so I want to get a variety of qualifications at the end of it! For my final year at college I will choose between Hair level 3 and Beauty Therapy level 3 after this year so I can experience hair as well as beauty to see which I prefer.
 
So far we've been washing hair, cutting hair (One length and Uniform layer), Blowdrying and Styling which have been stressful but fun. It's good that we've started to cut so early on because it means we can complete assessments quickly. 
 
The cost of this years kit was £131 and uniform was roughly £10 which was a lot cheaper then Beauty Therapy even though we get more this year!
 
Another great thing about this year is I'm only in 2 and a half days a week, so I can relax through a 4-day weekend! It's good because we are doing so much in the 2 days it's nice to relax.
 
It's very different from last year as we're a lot more involved with talking to clients/customers where as last year we were very quite as the client had to relax through-out the treatment. I enjoyed last year but progressing wasn't the choice for me because I wasn't interested in level 3 treatments however, it would make me more employable. I got qualifications in reception work, facials. manicures, pedicures, tinting, manual tan, waxing and head massage.
 
The work is more practical with a small amount of theory which is the same as last year however, it's a lot more relaxed. The teachers are all very supportive and always happy to give advise if your unsure which makes you feel very welcome into the course! 
 
The course is more aimed at women's hairdressing however, we do barbering as well once a week which is great as it give us more experience working with male clients as well as female clients.

 
Thank you for reading this post! I'm going to become a lot more active with new posts every week as it's something I enjoy doing. Feel free to comment and share this post to your friends!
Thanks, BeautySickelmore xx 

Skincare Routine 2016 // BeautySickelmore

Skincare Routine 2016


Every day and night I like to use my skincare routine so my skin will look the best it can. I like to cleanse, tone and moisturise every morning and night and I like to use an oil every night so it can be absorbed into the skin. I also like to use a mask and exfoliator 2-3 times a week to get rid of any dead skin and help my skin look better and to help minimise spots.
I always cleanser, tone, exfoliate, mask, moisturise and then an oil. I also use Garnier Micellar Water to remove my makeup off at night or when I'm being lazy or I'm running late I'll use it in the morning as a cleanser before putting makeup on. I don't tend to use an eye cream as my oil is able to go under the eyes and I don't want to use too much product under my eyes.
 
 
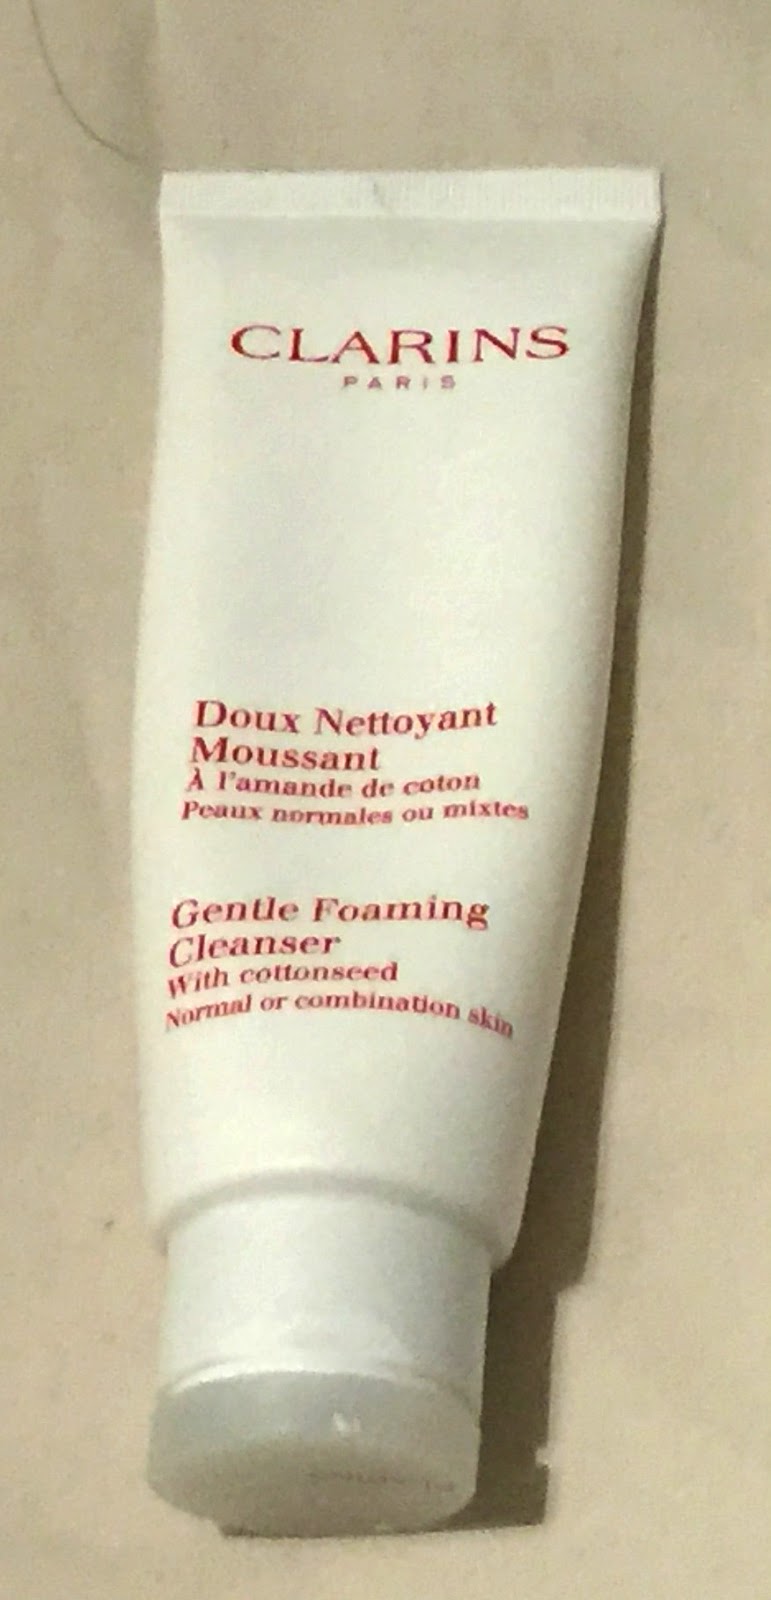
1. Cleanse- Clarins Gentle Foaming cleanser for normal to combination skin- £19.50
I love using this daily as it's very gentle on the skin and make my skin feel squeaky clean. I like to cleanse twice as the first gets and left over makeup off or dirt and the second gets deeper into the pores and thoroughly cleans the skin. You only need a small amount (pea-size) and add water to it. I prefer to add water to the product and then put it on my skin then to wet my face first. This foams up lovely so it gives you a squeaky clean finish. Once you use this you skin becomes soft and clean. After using this for a few months now I've noticed a drastic change in my spots! They've become less visible and are decreasing in redness, so that way I would rate this 5/5.


2. Tone- Clarins Gentle Exfoliating/ Brightening Toner- £25


I love using this toner on my skin as it's a 2-in-1 (It's a toner and exfoliator). It's very gentle and you can't feel any beads from the exfoliator which is nice because you can use it more often then a regular exfoliator. I love how my skin looks after toning as it looks clean, refreshed and brighter, which gives the appearance of healthier skin overall. I use this on cotton wool pads and dab/wipe over the skin once cleansed to rebalance the PH levels in your skin. Lots of people don't use a toner but I've very important for you skin as you need your PH levels in your to be rebalanced so you skin can looks its best. I would rate this 5/5 because it's so gentle but effective.
 
3. Embryolisse Lait-Crème Concentré Nourishing Moisturiser- £20
 
This is my favourite moisturise I've ever used! I heard about this a few years ago but didn't know where to get it from until I found it in boots and I've used it every day since. This is a thicker moisturiser but not too thick which quickly absorbs into your skin leaving it soft and not greasy. Again a little goes a long way do I use about a pea-size which cover my face. I use this after toning or in the morning after using the micellar water before foundation. My foundation looks at lot nice when I use this moisturiser underneath it! It smooth's out the surface of my skin so anything put on top won't exaggerate my spots or pore which is amazing! That's why I would rate this 5/5.
 
4. The Body Shop Vitamin E Oil- £15
 
This is one of the first oils I've used on my skin because I don't tent to use oily products but there are many benefits to using oils on your skin. This one needs 8 hours to absorb into your skin to nourish and he hydrate the skin. I was badly burnt in the summer and this oil has help with the sun spots left on my skin! I tend to use my finger with this product and once the whole face is covered I use The Body Shop Dual Face Massager as the cold from the balls stimulate blood circulation and help tighten the skin and pores. I've notice a huge difference to my skin from using the oil as it's help hydrate my skin whenever I get dry patches which will be a great help in winter as the skin tends to get dried out from the weather and using central heating in your house. I would rate this 5/5 because it's very effective.
 
5. Origins Out Of Trouble Mask For Problem Skin- £24
 
This is my favourite mask for my skin as it makes a huge difference to my spots! They become less visible and less red once this had been applied. I use my finger to apply the mask as it's quite thick, but a little goes a long way. Although it's thick you only need a little and you can add water to spread it onto your skin. Once applied you leave it on 10 minutes and then I tend to wipe it off with a dampened flannel. After you take it off you skin feel extremely soft and feels very clean. I would rate this 5/5 because its really help my skin when it looks its worst. I use this 2-3 times a week to be able to notice a difference.                                                                  6. Origins Modern Friction Exfoliator- £23                                                                                               
This is my favourite exfoliators because you can feel the beads in this so you know that its working at getting rid of dead skin cells and renewing your skin. The one in the picture is a tester so the original size is the same as the mask. So you get quite a lot for the money. I use a little (Pea-size) and add water to it to spread it over my skin. I also you a dampened flannel to wipe it of. Once wiped off your skin is left feeling very soft and smooth as all of the dry skin is taken off with the beads which makes you skin look amazing. I would rate this 5/5 because it's extremely effective and I use this 2-3 times a week normally whenever I use my mask I'll exfoliate as well.
 
7. Garnier Micellar Cleansing Water - £3.33
 
This product is great! Lots of people use this as it's so cheap. I love using this to remove my makeup with cotton wool as it's very gentle on the sin and is great at removing makeup. I sometimes use this in the morning to get rid of any dirt on my skin from overnight and then moisturise before applying my makeup as it makes my makeup look a lot nicer and smoother.  Its very quick and easy to use and extremely cheap so that why I would rate this 5/5!


Thank you for reading this post! I'm going to become a lot more active with new posts every week as it's something I enjoy doing. Feel free to comment and share this post to your friends!
Thanks, BeautySickelmore xx 


Friday 7 October 2016

Top 3 Eyeshadow Palettes // BeautySickelmore


Top 3 Eyeshadow Palettes

 
I love wearing eyeshadows as I feel they make your makeup look complete. I have blue eyes so I tent to wear champagne, golds, browns and copper shades on my eyes because they compliment my eye colour. For my everyday makeup I tend to wear a light/gold smokey eye and when I go out or special occasions I'll wear a darker colour on my eye. I love all 3 of these pallets as they include the shades/tones of colours that I like to wear on a daily basis however, they are quite expensive but they do have a lot of pigmentation!
 
 
1.Urban Decay Naked Palette- £38.50

This is my all time favourite eyeshadow palette as it contains all the colours in which I love to wear on a daily basis! This contains 12 eyeshadows which has high pigmentation and last al day/night on the eyelid without an eyelid primer. 11 shades are shimmer and 1 is matte. My favourite colours are Half Baked, Side car and Sin. I would rate this palette 5/5 you certainly get your moneys worth as I've had this palette for years now and I'm only just hitting the bottoms of certain eyeshadows.
 
2.Smashbox Full Exposure Palette- £38.50

This is another favourite of mine as I love the colours in this palette. They aren't as pigmented as the Urban Decay one but they look just a pretty. I love how this palette come with 14 shades, 7 are shimmers and 7 are matte which allows you to create lots more eyeshadow looks compared to the Urban Decay one. I tend to use this not as much just because so many brands come out with palettes and I tend to use the cheaper ones first as I can always repurchase them as they are cheaper. I would rate this 4/5 because its a great palette but it could have better pigmentation for the price.
 
3.Stilla Eyeshadow Palette (Soul)- £30

This is another great palette and is the most different out of the 3 as this one contains darker colours and only 4 lighter ones which I love for autumn/winter time. This palette contains 12 colours which are a mixture of shimmers and mattes and this is the cheapest palette out of the 3! It has great pigmentation and lasts all day/night without an eyelid primer. I love how this pallets has shimmers which dont contain as much glitter as the other two palettes as you can create more subtle eyeshadow looks. I would rate this 5/5 because it has great pigmentation and it's well worth the money as it contains the same amount of colours as the Urban Decay one but is £8.50 cheaper!


Thank you for reading this post! I'm going to become a lot more active with new posts every week as it's something I enjoy doing. Feel free to comment and share this post to your friends!
Thanks, BeautySickelmore xx